# Document Management
# Getting Started
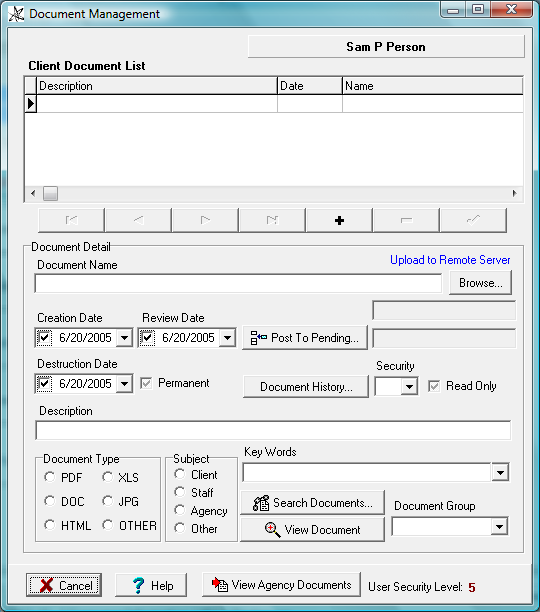
The Document Management button allows you to link almost any form of medical, financial, licensure, consent or document that may be relevant to a client to be viewed from and tracked by Quantum. These may be scanned paper documents such as signed consents for a client or client forms that are currently in digital format. Agency documents such as policy manuals may also be stored in the Document Management System.
To use the Document Management function:
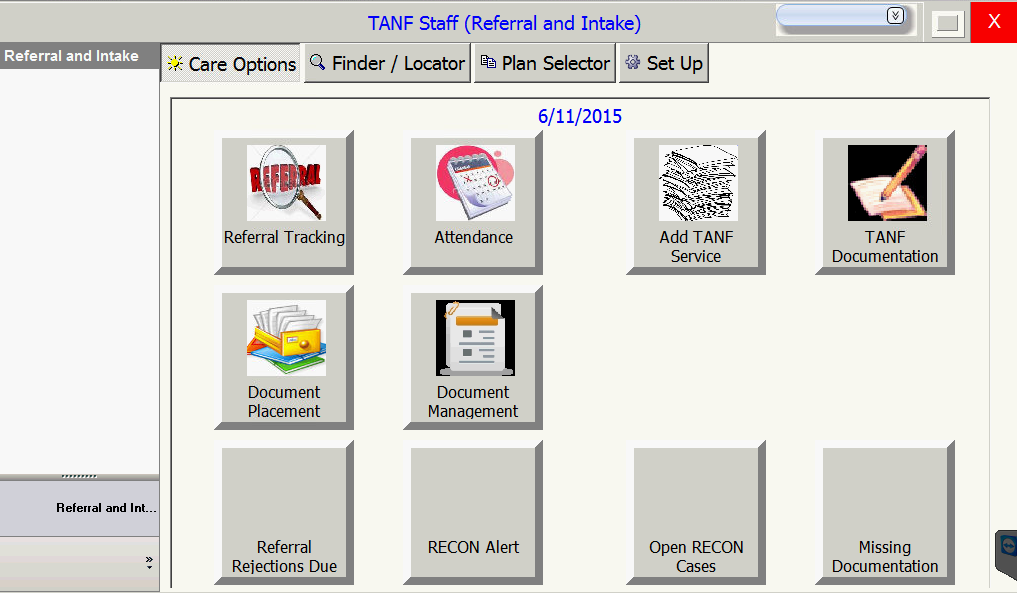
- From the Dashboard, choose the Document Management button.
To link a document to a client, you will first have to choose a client from the roster. Notice that the client name will appear at the top of the Document Management screen and the screen will now have “Client Document List” on the upper left side.

To store any general document that is not linked to a client click

from within the Document Management screen. This will make the top of the screen say the agency name instead of a client name.

# Using the interface
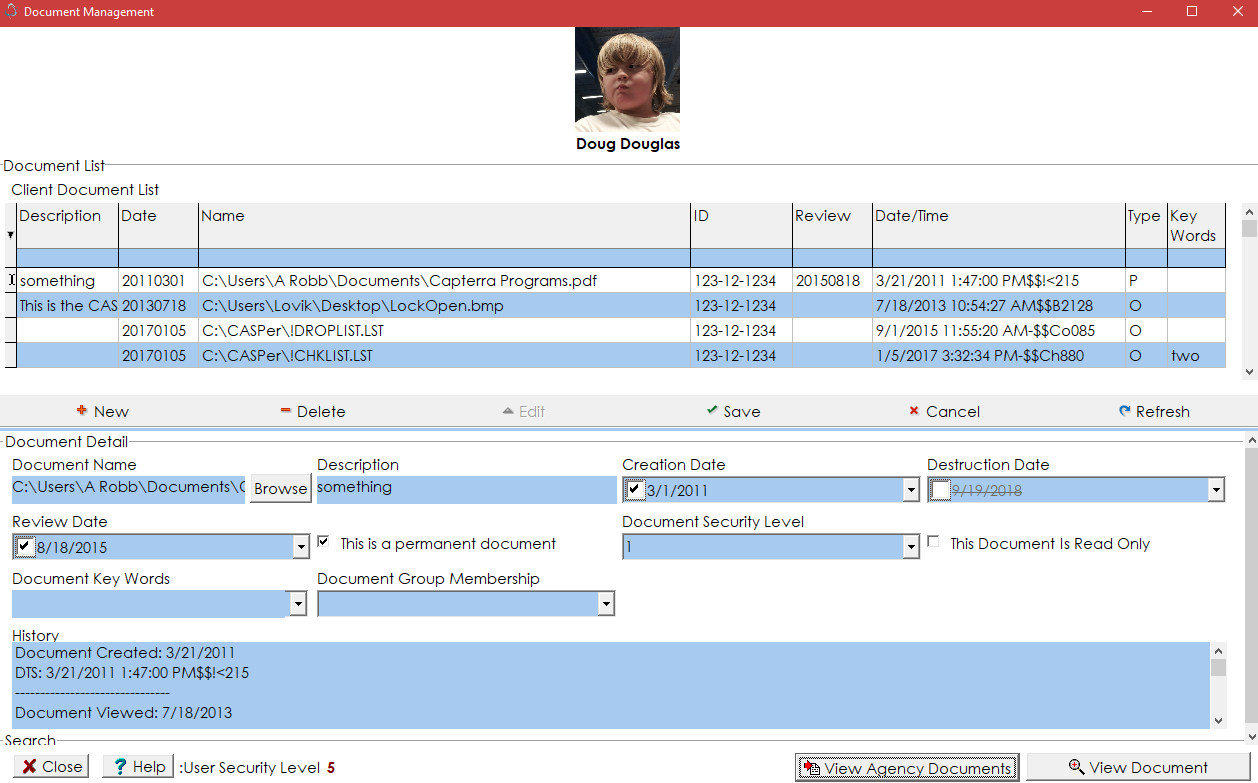
Click the

button to enter a new record.
Click the

button and navigate to the document you would like link.
Describe the document in the box labeled description.
Pick the Creation Date and Review Date (the date in the future to review this document if necessary).
Select the destruction date if the paper document has been destroyed.
Select the Permanent checkbox if the document is to be permanently filed for the client.
Use the dropdown to select the appropriate Security Level
Note
See Setting the Security Level of a User below.
Select the Read Only checkbox if the document will be available only as a read only document.
Choose from the “Key Words” drop down list to help Quantum and you find the document in the future.
Choose a Document Group.
Click the

button to save the document.
# Search
If you are not creating a document but searching for one click on the “Search” section title and the screen will change to the following:

Check any possible keywords under which the document would have been saved.
Select the Document Group for the document.
Click the “search” button and the software will search for and load all documents that match the criteria you selected.
Finding Agency Documents: To retrieve a document that is not client related but is an agency document, click on

at the bottom of the screen and the grid will load with any document that has been saved as linked to the agency.
Note:
The steps to add agency documents are the same as the client documents.
# Setting the Security Level of a User
Navigate to ‘Configuration Options’.
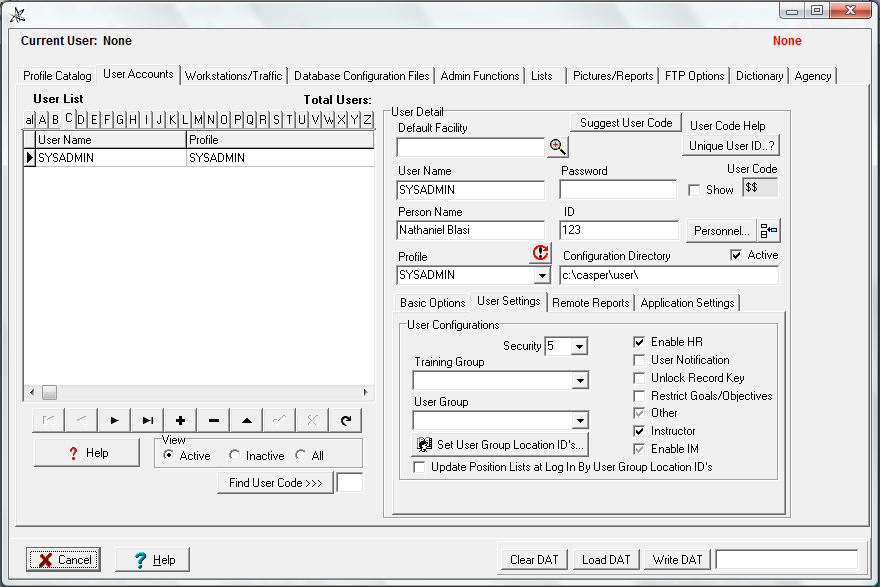
Click on the User Accounts tab
Click on the User Settings sub-tab
Use the Alpha tabs over the grid to the left to search for the desired user to adjust,
Click the username that you want to change in the grid.
Select the appropriate security level for that User.
Click
to save the changes that were made
# Configuring Document Management List
Navigate to ‘Configuration Options’.
Click on the Agency Tab.
Click on the Configurable Options Tab.
Select “Document Mgmt Key Words” from the Option Selector dropdown.
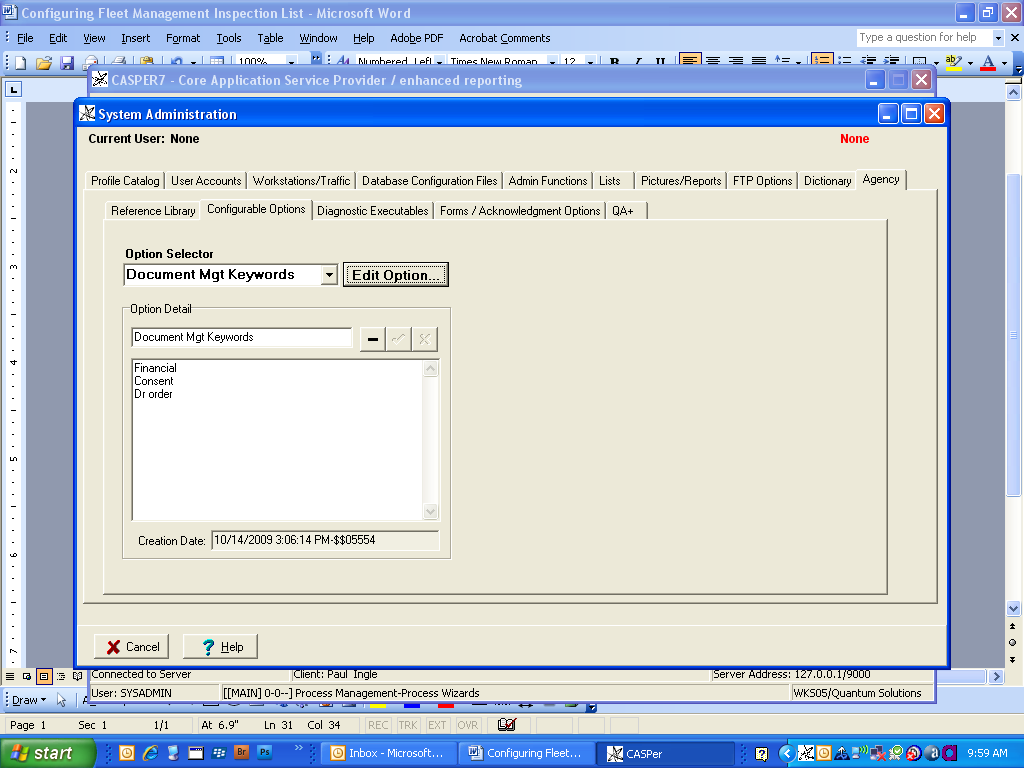
Click the
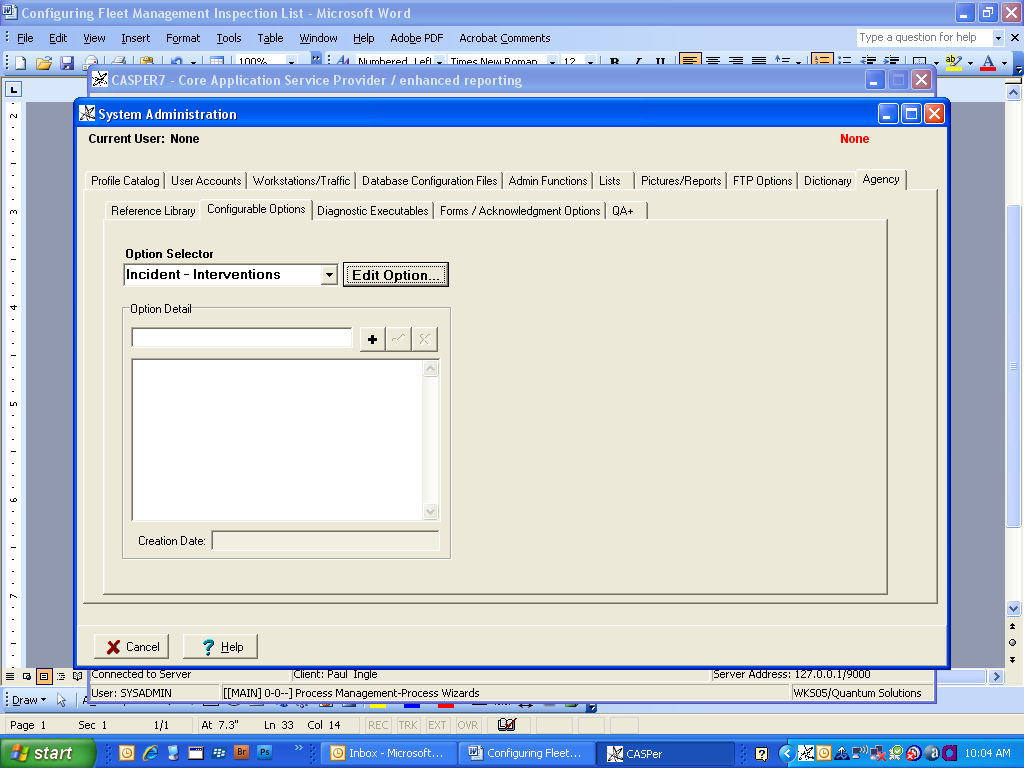
button to open the editor.
Click in the large white box and enter the contents you wish to appear in the dropdown as they will appear in CASPer.
Click the small black plus
 to save your changes.
Close Casper and log back in to see your changes to the Document Management Drop Down.
# Setting Up Document Management for Remote Users
Note:
It is important to install QDocClient on a static server that can be access by all remote CASPer users.
- Extract a copy of the zip file provided onto the desktop of the first computer that will be using remote document management.

- Move QDocClient.exe, libeay32.dll, and ssleay32.dll into the main CASPer directory.

Next copy Document Management Server Setup.exe onto the desired server.
Run the setup file being sure to follow all directions
When the Setup program asks for the Document Directory, enter C:\Casper Documents\Agency Name\
Note:
Make sure that you replace “Agency Name” with your agency’s name
When the Setup program asks for the server port, enter a four-digit port number.
Note:
Your IT specialist may need to open this port in your network
Once everything is installed return to the computer that has CASPer installed and run CASPer.
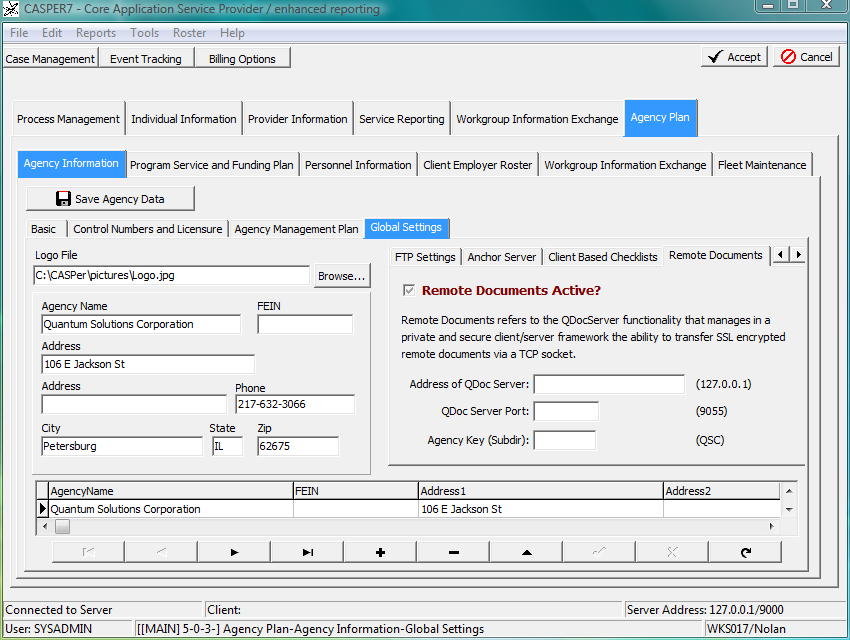
Once CASPer is open click Agency Plan
Click Agency Information,
Click Global Settings
Use
 to scroll all the way to the right to click on the Remote Documents.
In the Address of QDoc Server field, enter the ip address of the server that the client has been installed on
Enter the server port that you entered in the QDoc Server install process
Enter Your Agency’s name in the last field
Click
 to save the changes.
The following string can be used in command prompt to ensure that QDocClient is working the way it is supposed to be:
QDocClient ServerAddress ServerPort Command Agency FileName FilePath
QDocClient - The name of the name of the program
Server Address - the IP address of the server
Server Port - the Port of the server
Command - The only two commands are PUT and GET.
PUT - Uploads the file from the file path
GET - Downloads the file to the file path
Note:
Agency - The name of the subdirectory where the file will be transferred. This corresponds with a directory on the QDocServer
To view a document from the server, highlight the document in the grid
Click

Note:
The document will be copied from the server so that you can view and print the box.
# Document Management Button Setup
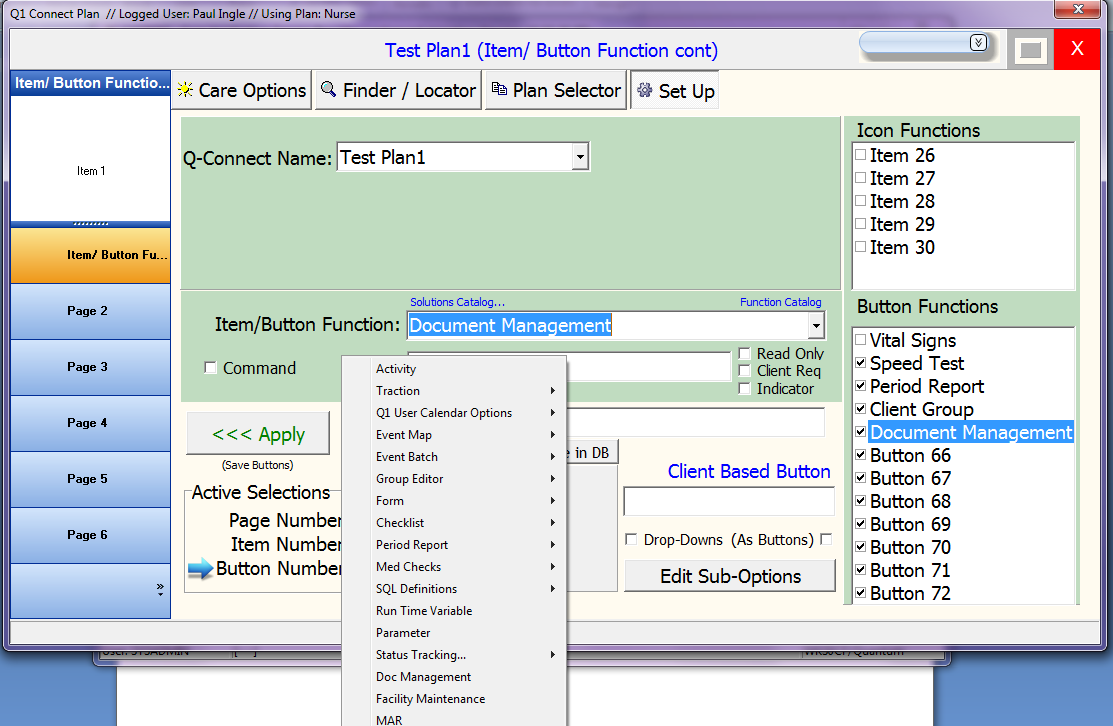
Check the box next to the button that you want to turn on
Right click the name of the button to rename the button
Note:From the Application dropdown, Period Reports
Click the blue options link the following information will be entered in to the Options Line.
(C)lient/(P)ersonnel/(A)gency/(O)ther|Caption|IDChoose the appropriate option
Client- C|@CLIENTNAME|@GLCLIENTID
Personnel- P|@StaffName|@STAFFNAMEAgency - A|
Other - O|
Click
 to save the button