# FlexMAR
# Introduction
# Launch the App
# Login
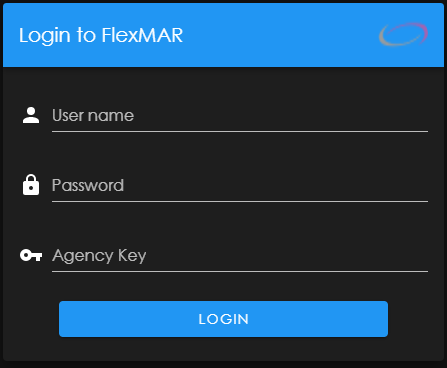
Login using your assigned username, password, and agency key given by your agency.
# Select a Dashboard
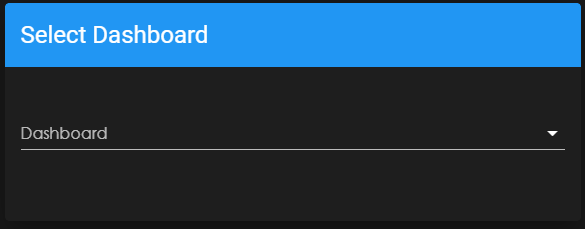
‘Select Dashboard’ allows the user to choose a dashboard from a list of pre-selected dashboards that they have access to. Each dashboard will show a specific group of clients custom to that dashboard. Some clients will be on multiple dashboards.
# Home Screen

Message will pop up anytime you change dashboards or groups (changes what clients you see) and will show 5 days’ worth of data (2 past, 1 present, and 2 in the future) then when you are back online it will sync back up.
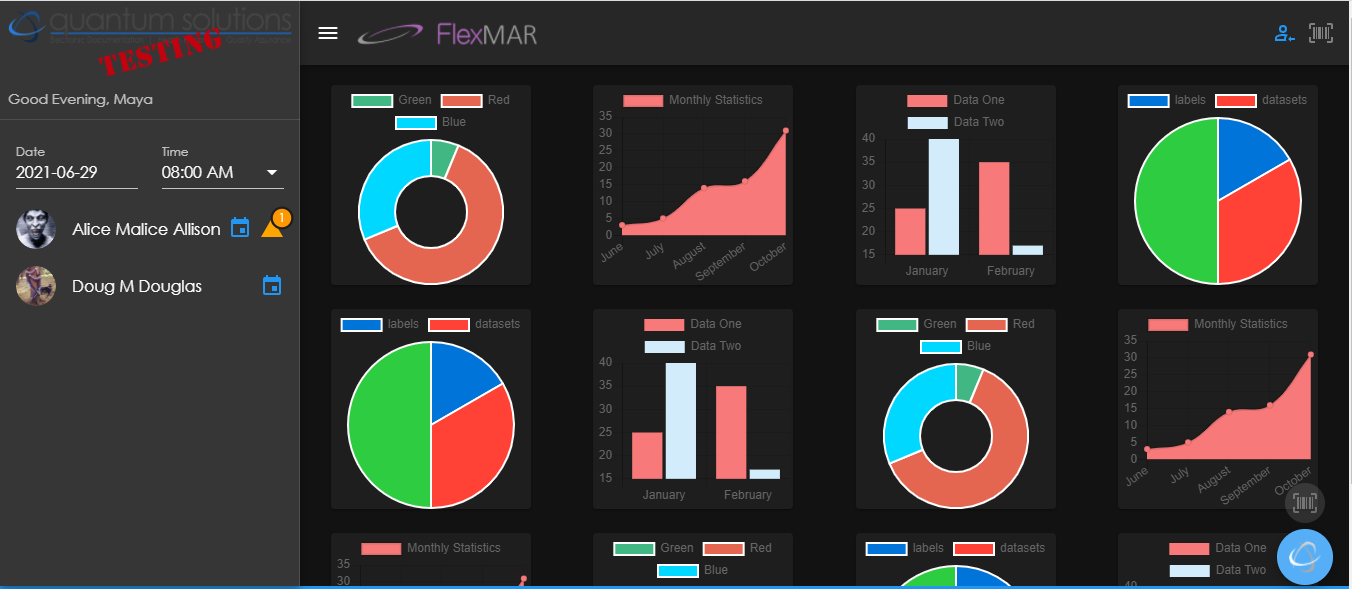
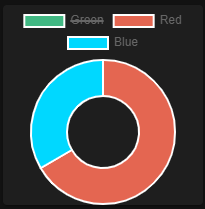
These charts are custom to the user’s preferences. Not all of these charts must be on the user’s home screen, but they can have as many as they wish. These are all optional layouts for how the charts could look, but they all show the same data.
:::
tip Note
This home screen will be changing and will look different in future versions.
:::
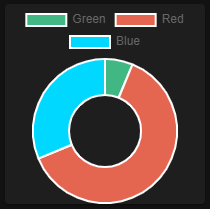
The user can also personalize the charts by crossing out data, so it no longer shows on the chart. The above picture shows the normal graph with variables: Green, Blue, and Red and the below picture shows the variable: Red and Blue with Green crossed out, so it does not show in the chart. The user can re-add the variable back onto the chart by clicking the variable again.
# Sidebar Controls
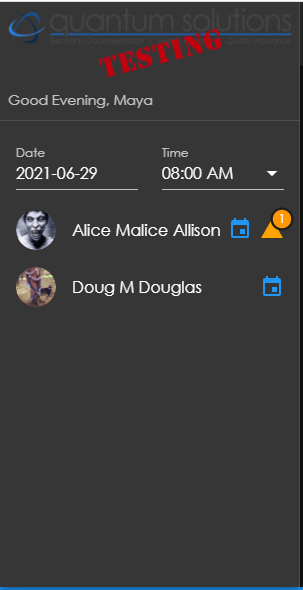
The side bar on the left side of the home screen can be opened or closed at any time by using the three lines at the top to the right of the side bar. This side bar is where the user will find their clients. The user can filter through their clients by using the Time Selector.
# Time Selector
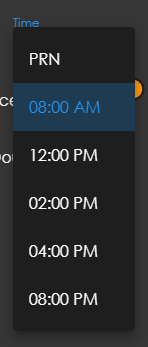
When the user picks a time from the time selector, it will only show clients that have a med during that time, or the user can select ‘PRN’ and all the clients that haves PRNS that day will be shown and can be selected. The time selector list will change depending on what clients have meds that need to be passed that day and time.
Example
There may be 3 clients one day and 14 different times that meds have to be given out. If one of the clients has a med at 8:00 AM and another client has one at 8:30 AM then both of those times will show in the Time Selector. If the user clicks on the 8:00 AM time, then all the clients who have an 8:00 AM med will be shown on the side bar.
# Client Information
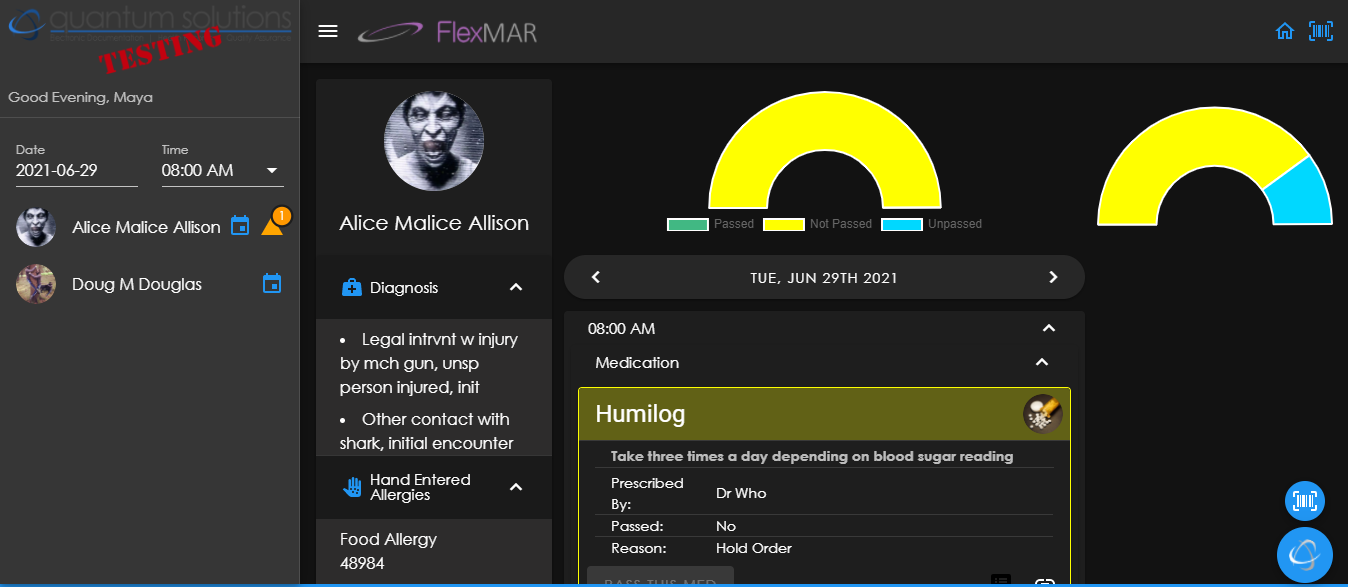
After the user selects a client, the client’s information will appear on the right side of the side bar. The information will have the client’s allergies and any special medications or notes/diagnoses the doctor or provider feels necessary to have on screenThe user can switch between days by using the date arrows under the graphs or using the date on the side bar.
# The Rainbows

The graphs at the top of the screen (that look like rainbows) show the passed, unpassed, and not passed meds specific to that patient. Some may also be more specific and show how many require an efficacy note in order to be passed. The user can click on the colored part of the rainbow and a screen will pop up depending on what color was picked and list the meds under that category.
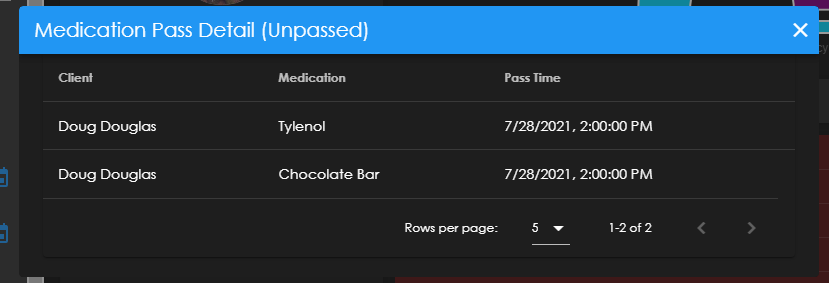
This is what that screen will look like. By clicking the blue part of the rainbow, it shows that there are two meds that still need to be passed for that time.
# Passing a MED
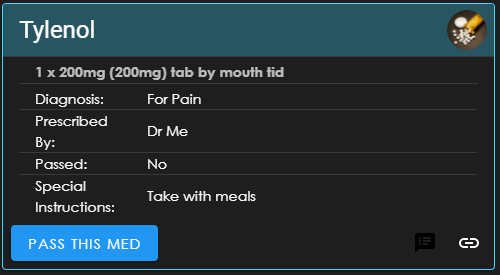
When passing a MED, the user will click the blue ‘PASS THIS MED’ button.

# ‘YES/NO’ Screen
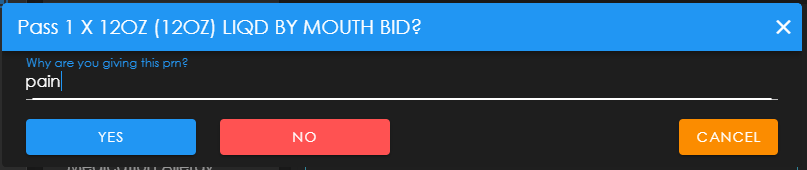
:::
tip Note
This image is for passing a PRN.
:::
This will then bring up a screen to which the user will click ‘YES’ or ‘NO’. The ‘YES’ button is for if the client takes the MED, and the ‘NO’ button is for if the user refused, missed, or didn’t need the MED. The user must also answer the question before being able to continue. If the user is passing a prn, the user will not be able to answer ‘YES/NO’ until a reason is given for why they are giving the client the med. ‘CANCEL’ will return the user back to the screen showing all of the clients meds for the day.
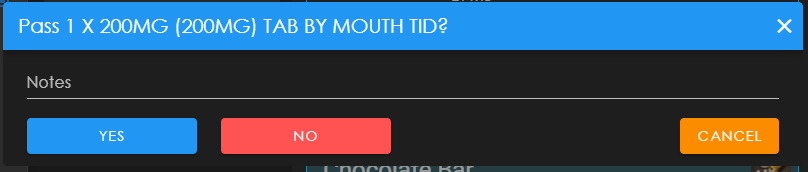
::: tip Note
This image is for passing normal repetitive meds.
:::
There is no question required before submitting ‘YES/NO’, but there is an optional Notes field that the user can fill out. ‘CANCEL’ will return the user back to the screen showing all of the client’s meds for the day.
# No
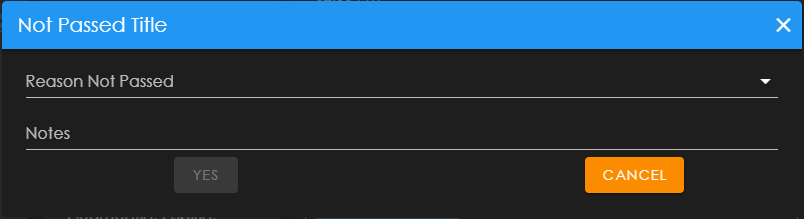
When the user clicks ‘NO’ this screen will appear and the user must fill out all the fields in order to submit the response, or the user can click cancel and return back to the screen before and re-answer the ‘Why are you giving this prn?’ question and click ‘YES/NO’. This screen will look the same if the user is passing a prn or a regular med. The user will select a reason for the med/prn not being passed from a preselected list using the drop-down tab.

This is an example of the types of reasons for the med/prn not being passed. Some of the reasons will have a follow up question that will have to be answered before the user can move on.
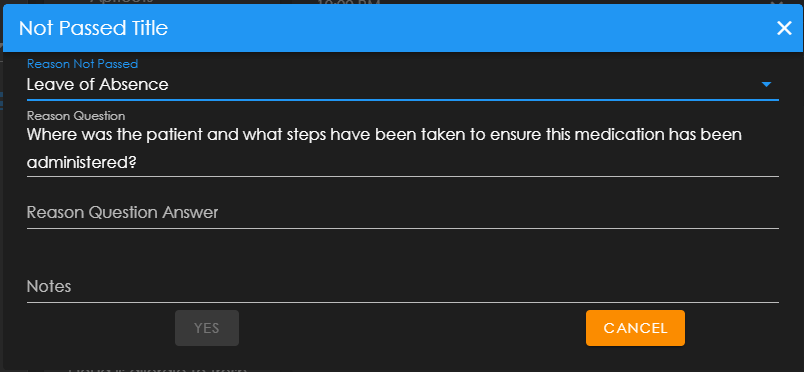
For this reason, there is a follow up question that has to be answered. An example answer to this question could be “The patient was out of town during the time this med was supposed to be issued, patient will take med upon return.” After the user answers the follow up question, there is a notes field that the user can put any additional notes into, but it is not required to submit the final response. Click ‘YES’ after all necessary fields are filled out, otherwise click ‘CANCEL’ to return back to the ‘YES/NO’ screen.
# Yes
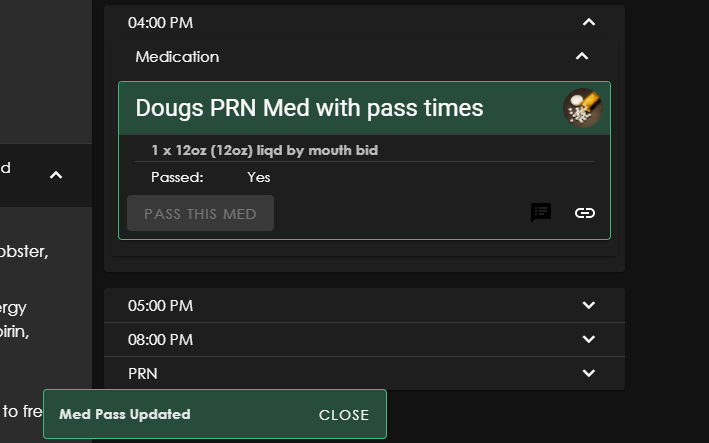
Going back to the ‘YES/NO’ screen, if the user selects ‘YES’ then the med/prn will pass and the ‘Med Pass Updated’ tab will appear at the bottom of the screen. The user can click ‘CLOSE’ to make the message go away.
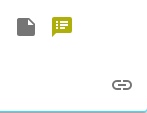
# Comment and links

Users can add comments by clicking the black text bubble button. The button to the right is for a link, (this is not finished yet)
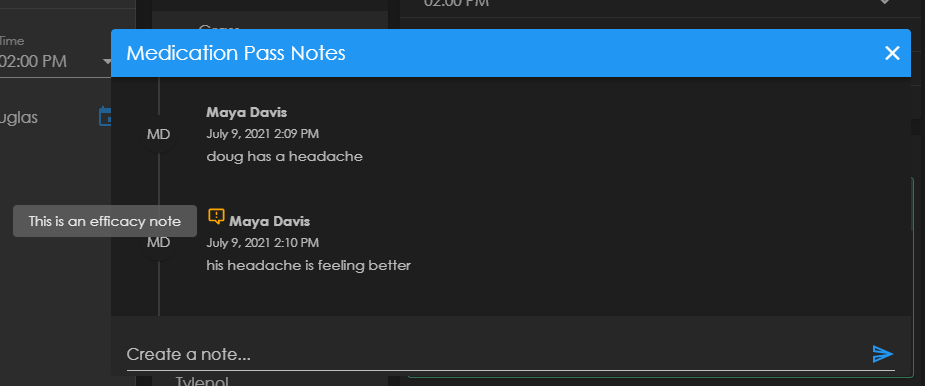
Users can use this button to add an efficacy note. The efficacy note is the note in response to the reason for giving a PRN. In the picture above, the orange chat bubble with an exclamation point inside is the symbol telling the user that is an efficacy note.
# Blue Circle Menu

To open the menu, click the blue circle menu button in the bottom right corner on the home screen.
# Functions

From top to bottom is Reset Service Worker, Download Data, User Guide, Select Dashboard, Select Client Group, Home Screen, and Light/Dark Mode.
# Reset Service Worker
This takes the user back to the log in screen so that they can log in as a different user if they needed to.
# Download Data
This allows for the user to download data while on their mobile device.
# Scan Medication

This is on the bottom of the screen above the blue circle menu.

This is on the top of the screen next to the home screen button.
# Return to Home Screen

This button is in the top right corner next to the top scan medication button and it will return the user back to the home screen.