# HR (Human Resources)
# Introduction
# Launch the App
The app can be accessed in your browser by entering the HR URL in your browser’s address bar.
# Login
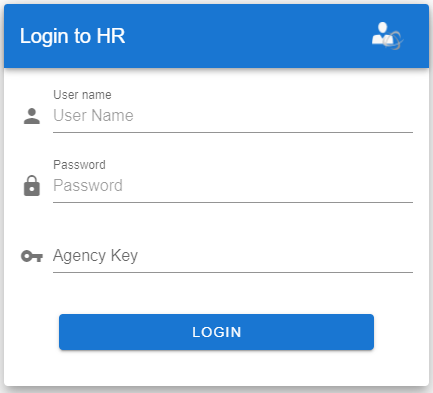
The Login screen will be presented when you first launch the web app. The user will insert their User Name, Password, and Agency Key assigned to them by their Admin.
# Home Screen
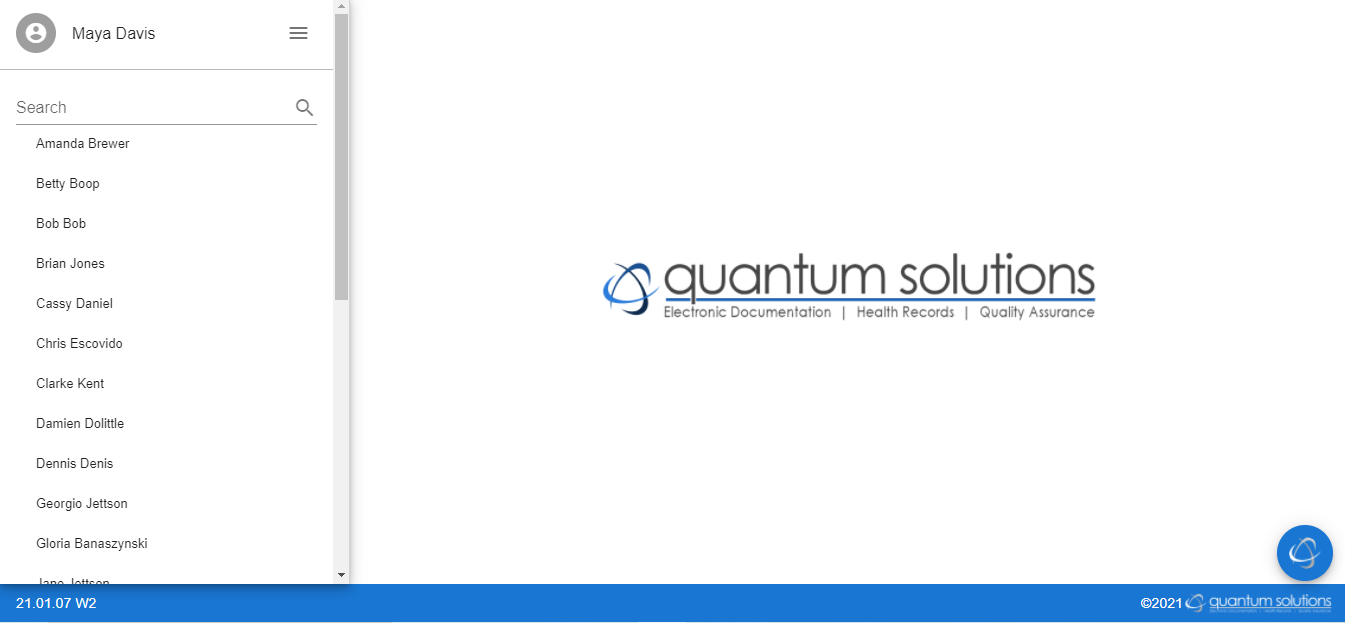
The Home Screen will appear after logging in with a roster of employees on the left side of the screen and the Blue Circle Menu in the bottom right corner.
# Blue Circle Menu

When the Blue Circle Menu is clicked, a stack of functions will appear above. From top to bottom they are Logout, Light/Dark Mode, and then Close
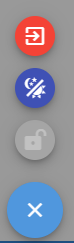
# Logout Button

The Logout button with log the user out of the account and return them to the Login screen.
::: Note
If the user is on an editing screen and logs out before saving, the page being worked on will not be saved. The user will have to recreate what was lost.
:::
# Light/Dark Mode

This function will toggle between light and dark mode.
# Select an Employee
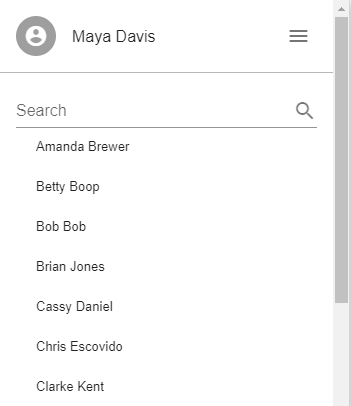
The list of employees is shown on the left side of the Home Screen. The user can scroll through the alphabetical list by first name to find the employee they are looking or begin typing the first or last name into the search bar at the top of the list. The very top name with the picture is telling who is currently signed in.
# Search Bar
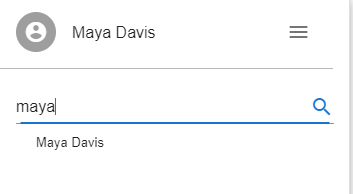
The user can either type just the first letter of the first/last name and all of the corresponding names to that letter will be shown or the user can type the full name and just that corresponding name will appear.
# Personal Card
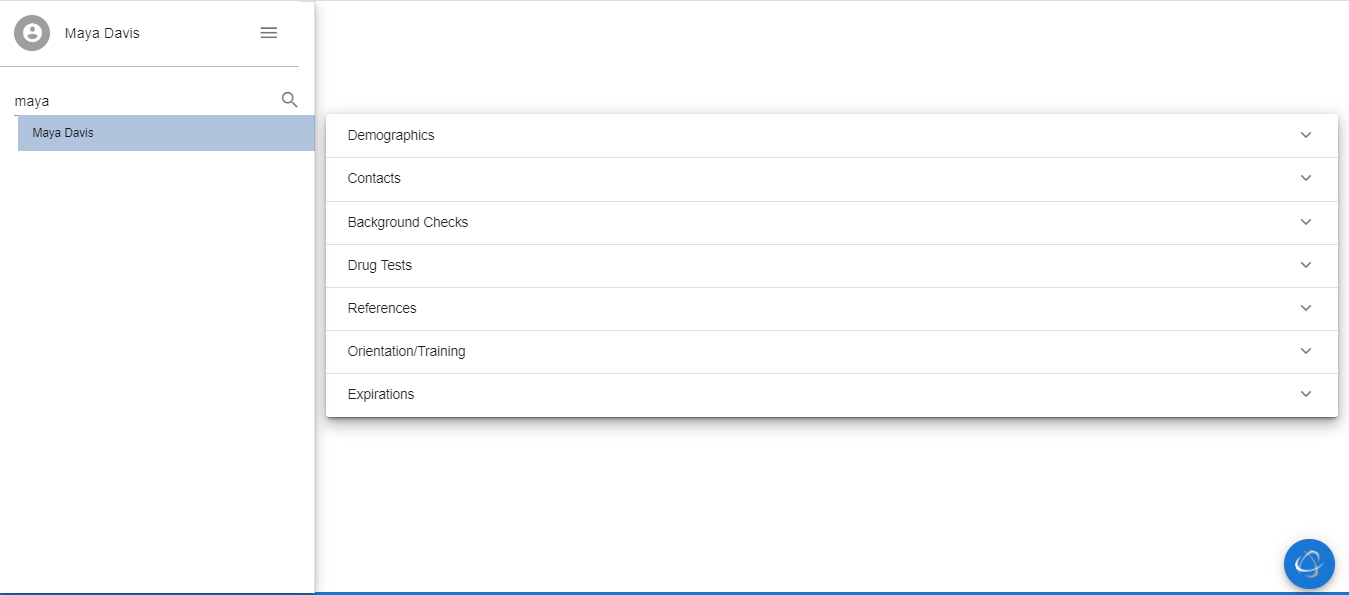
The personal card is where the user can find information on the selected employee. Each of the sections, to the right of where the user searches for an employee, holds different information that the employee or supervisor has entered. Each section is its own drop-down and can be opened by clicking the drop-down arrow on the far-right side, or by clicking anywhere in the row for that section. To close a section the user can click the section bar or drop-down arrow like before to open a section, or by clicking on another section.
# Demographics
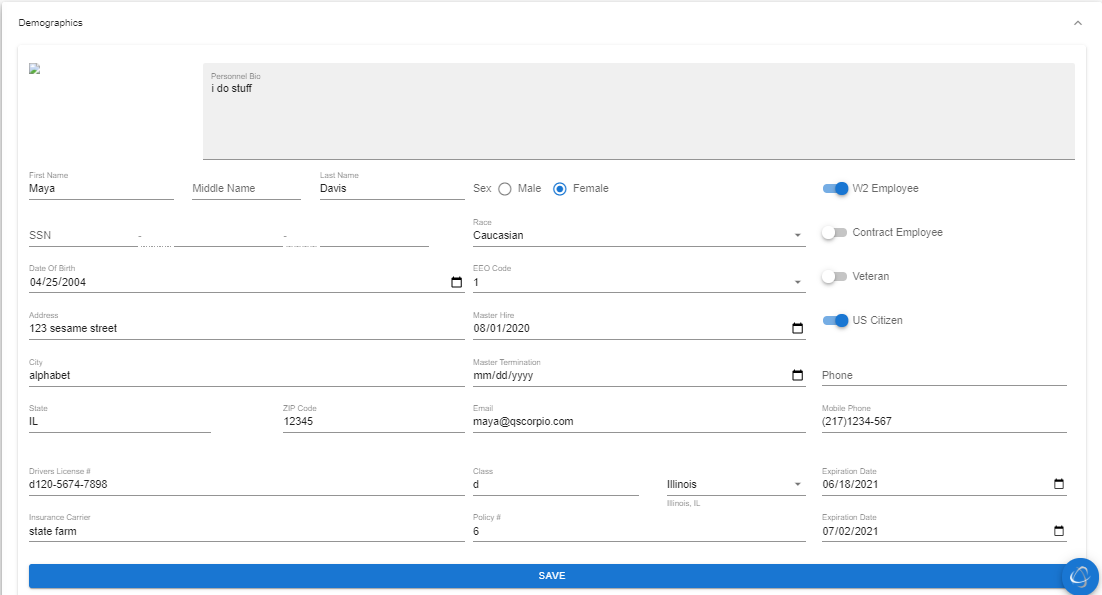
This is the section that contains the most personal information. When filling out this section, nothing is required because of the amount of personal information that other employees would have access to. There is a Personal Bio at the top of the Demographics section that allows for the user to freely type what they want. Next to the Personal Bio is a spot where the user could add a profile picture. The profile picture will be shown wherever there is a silhouette picture currently.
# Save

Before clicking onto a new section or closing a section, make sure to click the save button. For Demographics, the save button is at the bottom of the section. Because the save button is on the same screen as the screen that opens when the user opens Demographics, it will just remain on that screen.
::: Note
After clicking ‘Save’ the user may need to close the section and reopen it to verify that their changes have been saved. If the changes have not been saved, refresh the page and reopen the section.
:::
# Contacts
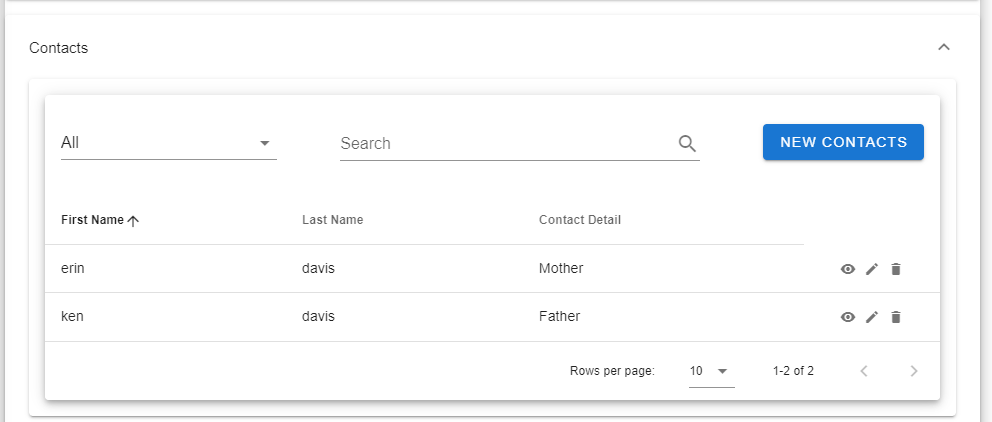
The contacts section is where the users can enter all of the important contacts they feel necessary. The drop down labeled ‘All’ is a filter that can be used to filter through all of the contacts.

These are all of the filtering options to filter through the lists of contacts.
# View, Edit, and Delete

The view function (the eye) and the edit function (the pencil) have the same screen as the creating a new screen. The only difference is that in view mode, the user cannot edit. When in view mode, there is a ‘Close’ button to exit view mode and return to the main section. The Edit screen will have a ‘Cancel’ and a ‘Save’ button. Make sure to press ‘Save’ before closing the section because it will not save on its own. The delete function (trashcan) allows the user to delete a saved contact
# Create new

To add or create a new contact, press the blue ‘New Contacts’ button that is on the right side in the contacts section.
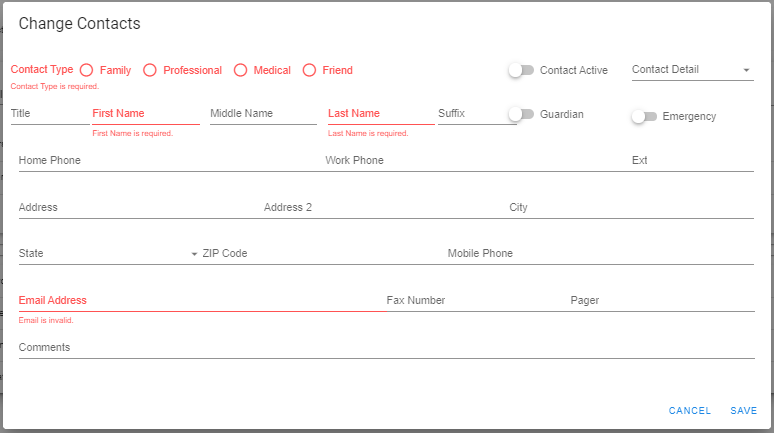
This screen looks the same as the edit and view screens, but this one shows what fields are required to be filled out in order for the new contact to be saved.
# Cancel and Save
When in edit mode, the ‘Cancel’ button will delete any changes made during the current editing session. Any changes made during any previous editing session will be saved if the ‘Save’ button was pressed. Changes will not save unless the ‘Save’ button was pressed.
# Background Checks
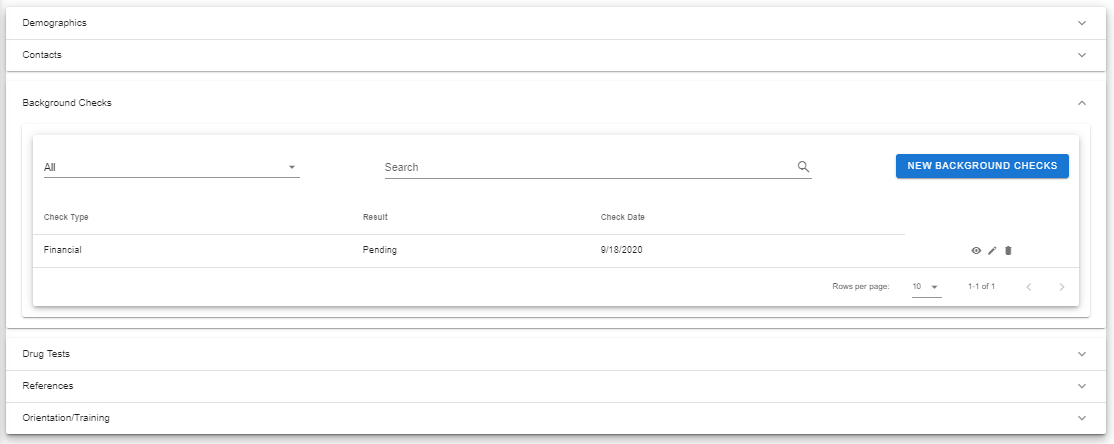
Background checks will show all of the previous and current background checks that have been entered. There will be four types of background checks to select from, and can be filtered through by using the dropdown underneath the ‘Background Checks’ section title. A user can also search for a background check by typing in the search bar next to the ‘New Background Checks’ button, the type of background check the user is looking for.
# View, edit, delete
Refer to View, Edit, Delete above.
# Create new

Select the blue ‘New Background Checks’ button to create/add a new background check.
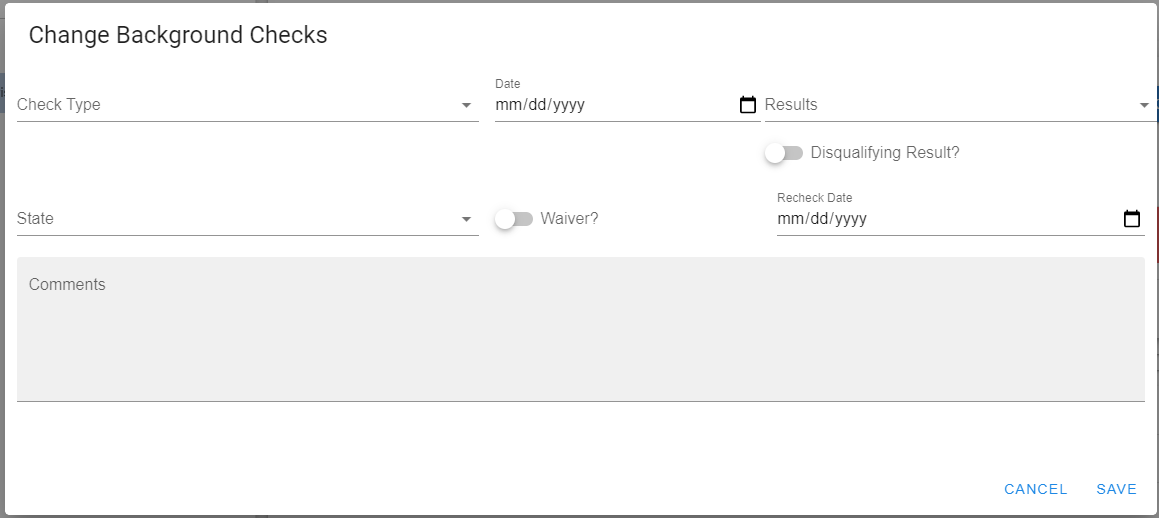
Refer to Cancel and Save above.
# Drug Tests
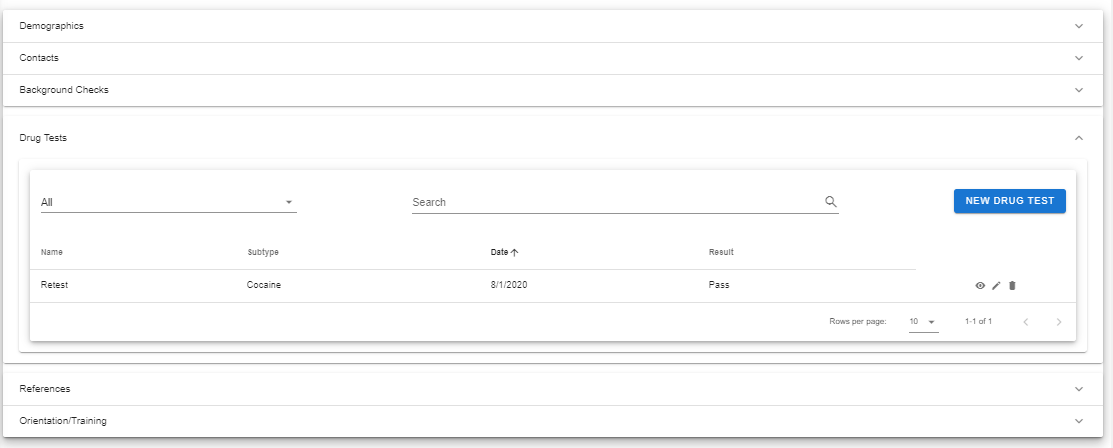
Drug Tests like the other sections, will show all the previous and current Drug Tests that have been entered. They can be filtered through by using the filter on the left under the Drug Tests title. The drop-down filter and search bar will filter through the reasoning for drug test,
# View, edit, delete
Refer to view, edit, and delete in the Contacts section.
# Create new
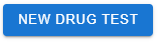
To enter a new drug test, click the blue ‘New Drug Test’ button.
GET NEW PICTURE!!
When entering a new Drug Test fill in all the required fields. The new drug test will not be saved unless all of the required fields are filled out.
Make sure to save before closing the section, otherwise it will not be saved on its own.
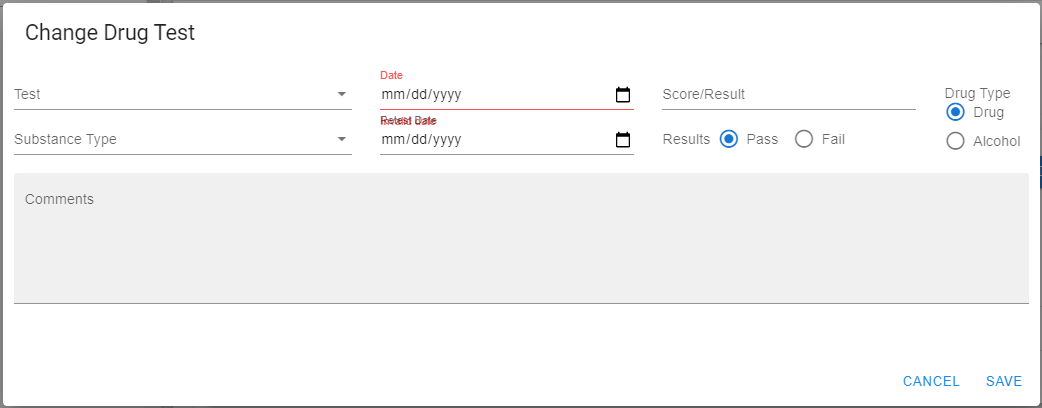
# References
References show the previous and current references that have been entered by either the employee or the employer.
# View, edit, delete
Refer to view, edit, and delete in the Contacts section.
# Create new

To add a new reference, click the blue ‘New Reference’ button
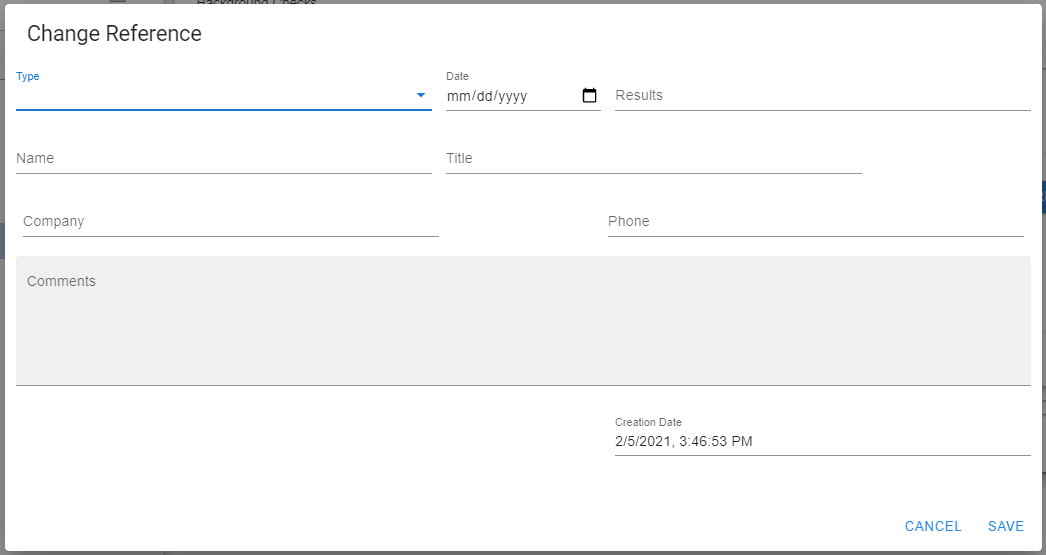
There are no required fields for this section so whatever fields the user wants to be filled out can be. The drop-down for the type of reference is between a personal reference and a previous employer reference. All of the fields are narrative fields, meaning they are all writable and don’t have a limit on the number of characters
Make sure to save before closing the section, otherwise it will not be saved on its own.
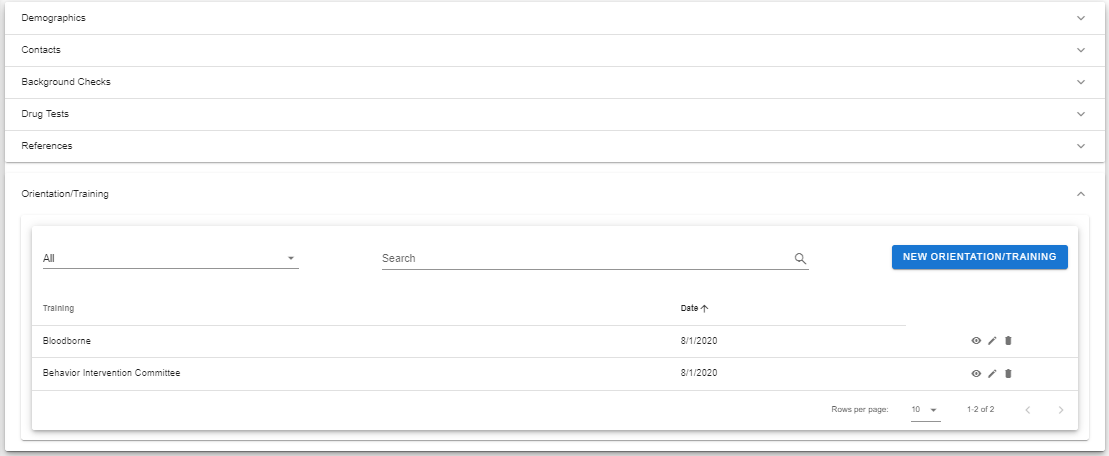
# Orientation/Training
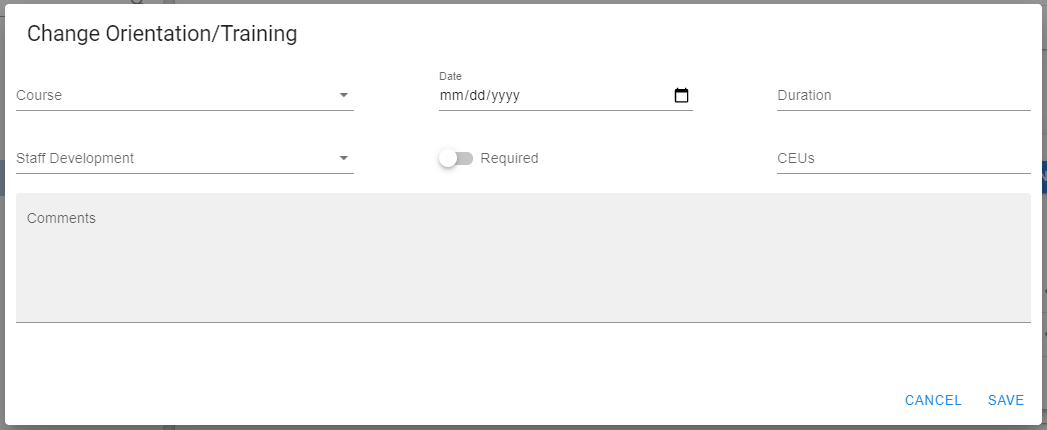
# View, edit, delete
Refer to view, edit, and delete in the Contacts section.
Be sure to select the save button before closing the section. If the user does not wish to save the section hit ‘Cancel’
# Create new

Select the blue ‘New Orientation/Training’ button to add a new title
This section of Training is asking about what previous training skills the user has. MORE TO THIS SECTION
Be sure to save the section.
# Expirations
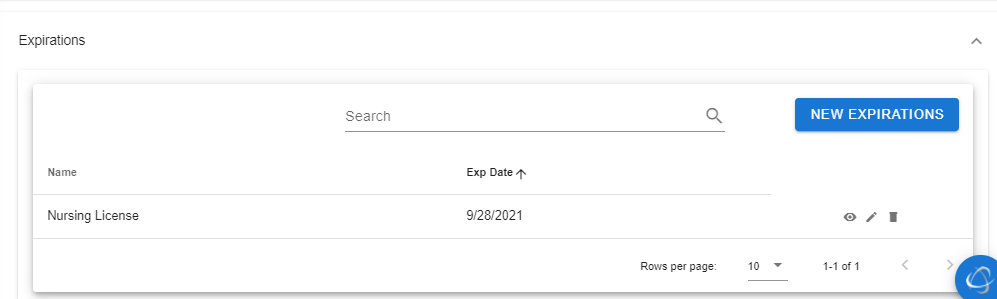
The user can add the Expiration dates for different titles and licenses (whatever has an expiration date the user can add) The main tab will show the title of the license and the expiration date.
# Create New Expiration
To add a new Expiration date, click the blue ‘New Expirations’ button.
# View, Edit, and Delete
Refer to view, edit, and delete in the Contacts section.

Fill in all the necessary sections and dates.
Don’t forget to save the new or edited Expiration date or it will not be added/changed.
Last Updated 6/28/2021